Ahh, the Confluence. A short and sweet hike down into the Grand Canyon…not! Don’t let this hike fool you guys, it is difficult, hard to follow, and pretty exposed. It’s much different IRL than on a video or blog post, so please be sure to research, research, research before you decide to embark upon this epic trail while you’re in the beautiful Havasupai Campground! This post will cover how we planned ahead for it, what we brought with us, and how the trail was in 2025 (after the flash flood in 2024). Let’s go!!
What Is The Confluence?
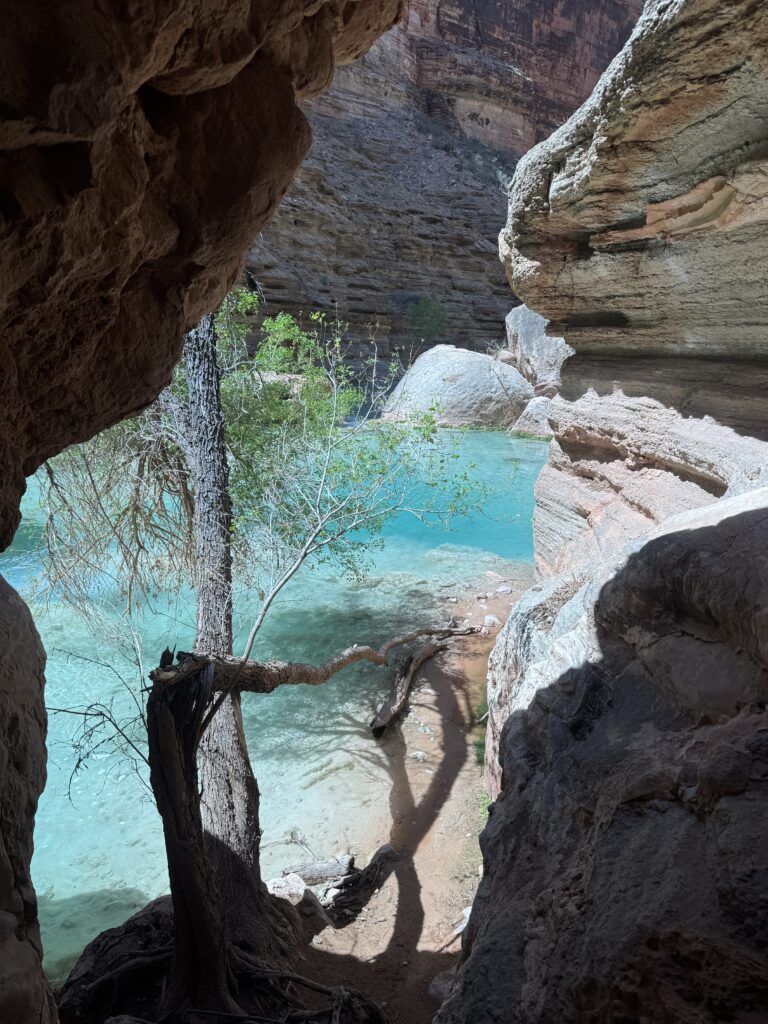
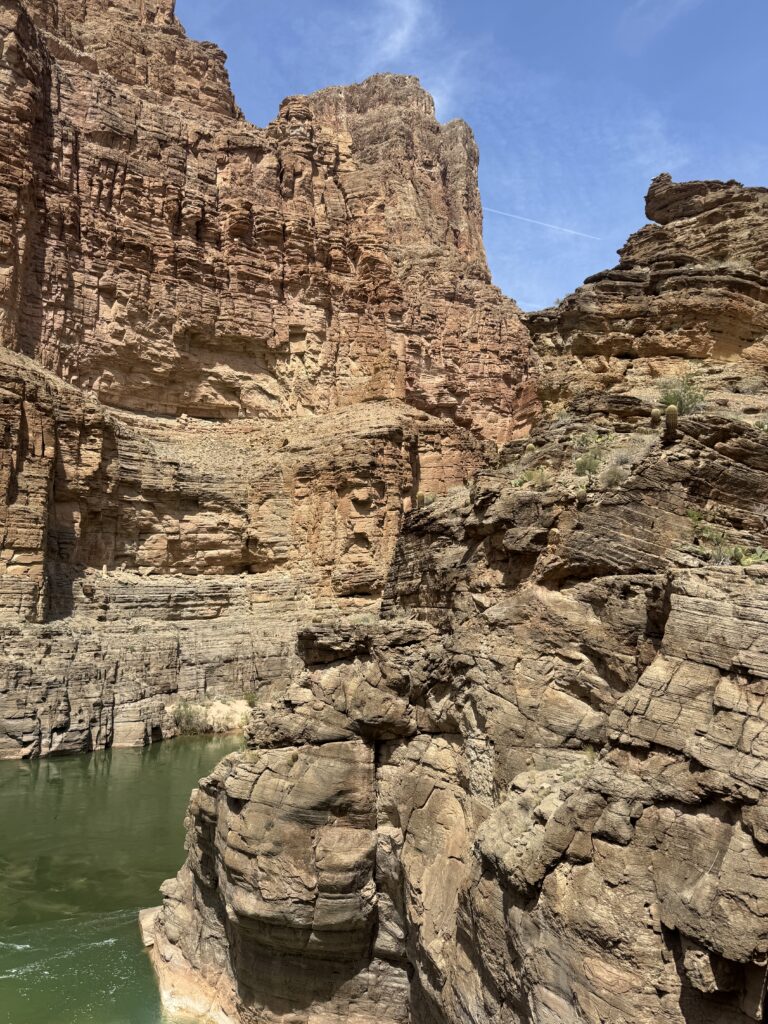
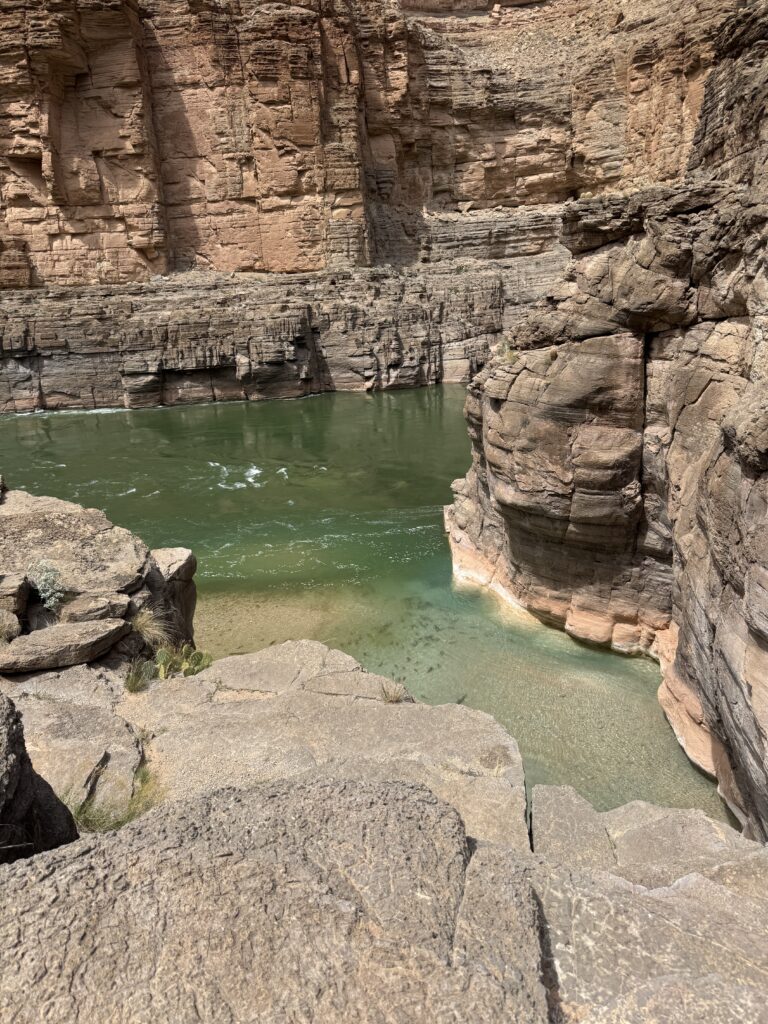
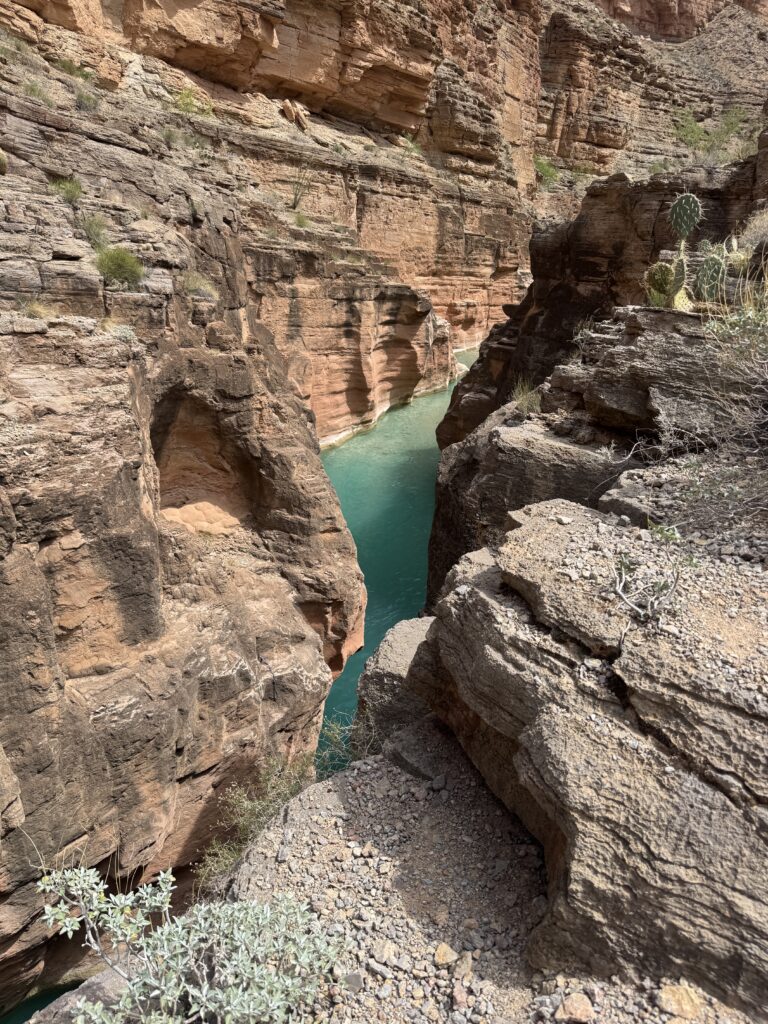
The Confluence is where Havasu Creek meets the Colorado River, located deep in the Grand Canyon and accessible via a strenuous trail from Havasupai. Known for its bright blue-green water merging with the Colorado’s darker current, it’s one of the most scenic and remote day hikes in the region.
Why We Decided to Hike The Confluence from Havasupai
Would I do it again? Yes. Was it extremely annoying? Also yes. Let’s start from the beginning.
I have nothing but love for trails of all kinds, especially the ones that put me to the test through both mind and body. It’s the endurance, the amazing views, the irritability that comes and goes as I move through states of mind along the quiet and questionable pieces of the hike.
The steep drop offs, the straight uphill climbs, the wandering off trail a whole bunch, it’s all going to happen when you make your way onto the Confluence Trail. Some YouTubers we watched afterward do the same trail said it’s not worth the trip, but I beg to differ.
Once the pain creeped up my legs, once my foot cramped for the MILLIONTH time this trip, once a stick poked through my sandals and catapulted me into the abyss…that’s when I knew this was my kind of trail. Despite my RBF the entire time. 🙂
I love these kind of hikes, they’re both challenging and perfect in so many ways. On that video, they mentioned that it was “BORING.” Like, what? Did you forget where you are at? Allow me to remind you. 👇
“Are We There Yet?” Syndrome
I think that is something that comes along with grueling activities. It seems like a great idea until we actually do the thing, where we soon find out that “oh, the thing is really hard,” so our brain switches from “this is so much fun!” to, “are we there yet?”
Which ironically is something I continually work on in this life, learning how to accept the suck. Being comfortable with being uncomfortable. Because every time I tackle yet another one of these battles, a new feeling of accomplishment rushes over me, knowing I was able to successfully do the thing without giving in.
Let me explain what I mean by “giving in.”
Sure, your body will fizzle out at some point. Mine seems to check out around mile 6-7. I’m usually feeling super amazing up until then, chatting up the hubs about our next adventures and bee-bopping along with no external motivation needed. And then, around mile 7-8, I notice a significant drop off in my energy level, no matter how much I prepared ahead of time.
This is when you need to dig deep, find that inner strength and pull that sh*t out of you…(Millennials, you’ll know the line). But in all seriousness, it becomes all mental after that. For the next 8 miles, I went into my own head and decided I would become present and see the beauty around me instead of checking out and waiting for the ride to end.
Packing List for The Confluence Day Hike
Once we knew for certain we’d be packing not only for the Havasupai Falls trail, we made sure to bring a daypack that would allow us to hike to the Confluence without lugging our giant backpacking packs the 16 (approximate) miles there and back.
Of course, carrying an extra pack seemed a bit annoying, which is why we determined that just one would do the trick instead of bringing both of our daypacks. (We were supposed to switch on and off throughout the hike to the Colorado River, but the hubs was nice enough to notice my struggle and carried it the entire way instead). <3 Yay for awesome partners!
We really love the Osprey line of packs, I’ll link a few below that we use most often. Check out our trip back home post (coming soon), to see which luggage options of theirs we’re loving as well!
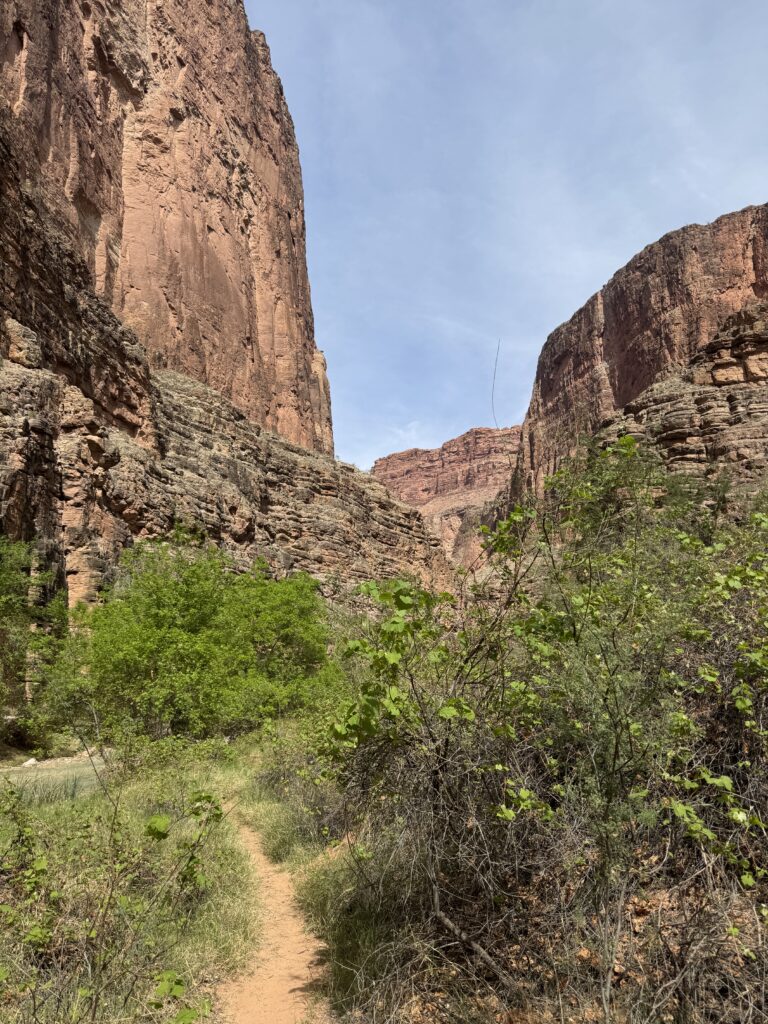
After seeing a few couples with really lightweight, more packable style backpacks, we were grateful to have suffered the extra weight to be able to have a backpack that was fully supportive with padded shoulders and a thick hip belt to help distribute the weight evenly. A lot of the trail was gradually uphill and downhill, but there were several parts that shot straight up or down as well.
Here’s what it looked like after a bunch of creek crossings on the way there!
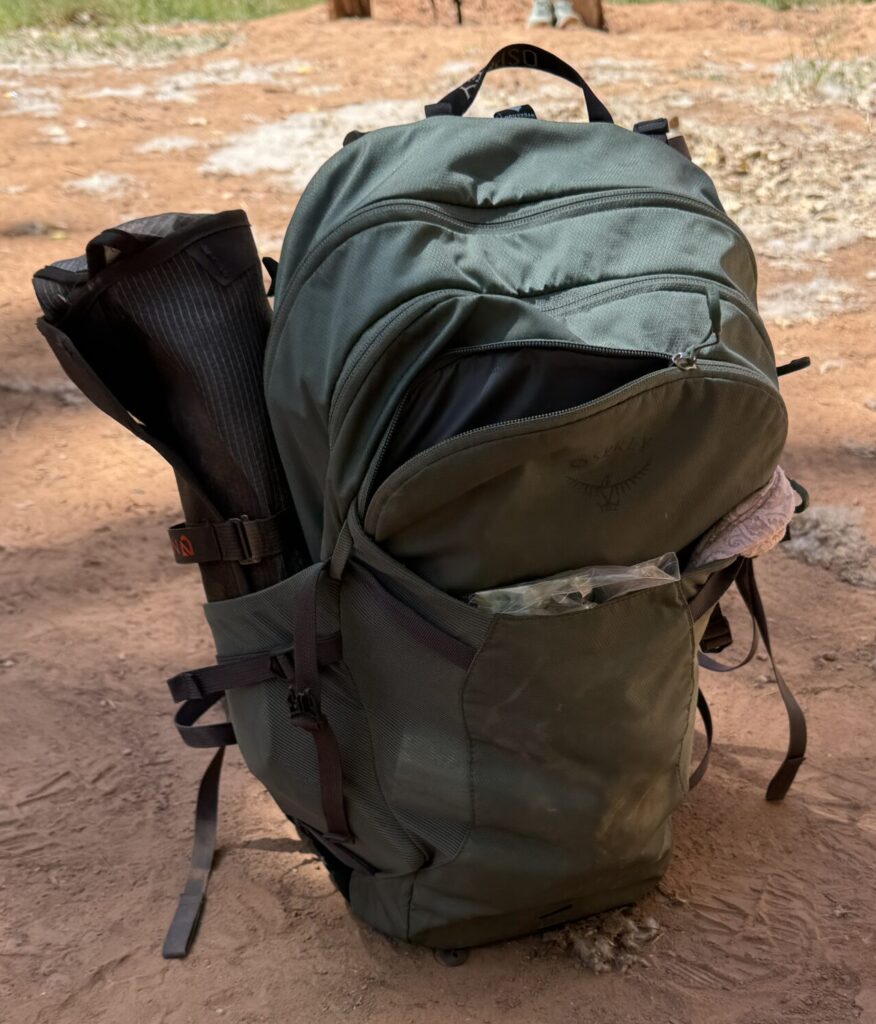
Our favorite current go-to packs by Osprey:
- Osprey Eja 48 Ultralight Backpacking Backpack (I chose the one in this link, the hubs liked the plain gray)
Here’s what we opted to carrying with us to the Confluence in case you’re wondering!
- JetBoil stove (including waterproof matches, a windproof lighter and a small fuel canister)
- Water filter in case there were any stops along the way to fill our water bladders…there wasn’t
- 3 liter water bladder filled to da brimmm
- A few snack bars for us each
- Stinger Energy Chews, Salt Stick electrolyte tablets, and of course, grape jolly ranchers
- Two lunch meals and sporks (<— one of my favorite words)
- Chapstick (which you’ll soon find for purchase on Habitual Balance! Yay!), sunscreen, bug spray, and hand sanitizer
- Sandals to change into for the creek crossings…there were TWELVE, guys. TWELVE. Bring your grippy flippys folks.
- My all-time new favorite pee cloth, yes really.
Anddd here’s a few things I WISH I would have brought along with us…
- I had the perfect cooling rag to tie to the backpack that was excellent for the hot day…I forgot this and highly regretted it.
- A small, lightweight camelback. Because your girl needs ALL the water, mmkay.
- A pair of shorts under my pants, or the fancy zip-off kind because each time I rolled up my pants the elastic cut my circulation off. It was great. Orrrr just be okay with walking through cold(ish) water a bunch and suck up the wet pants.
- A DOWNLOADED TRAIL MAP. Something I do all the time, except of course when I’m in a remote canyon with no service for days. Makes sense, right? (I like AllTrails, he’s a Gaia Guy, both are great but I actually prefer having the trail downloaded on both!)
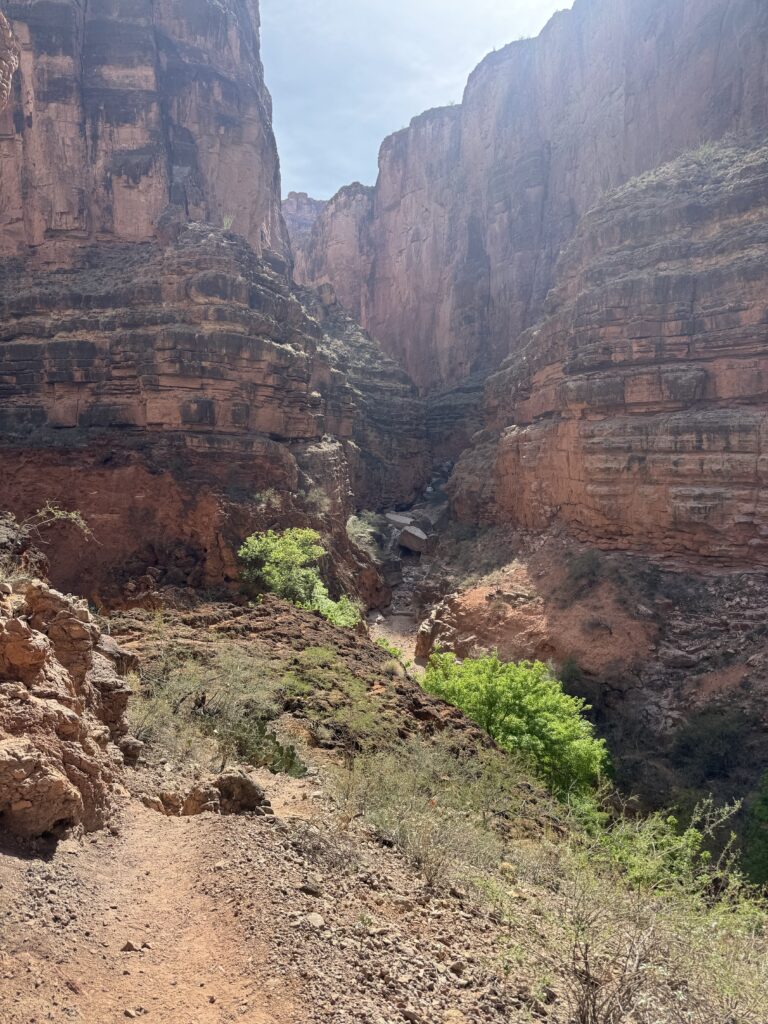
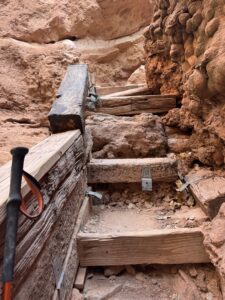
For real though, the trail was not easy to follow the entire time. There’s a lot of zigs when you should be zagging and a lot of zags when you should be zigging! Be sure to drop pins if need be on your way through, so when you’re traveling backward you know exactly where to go.
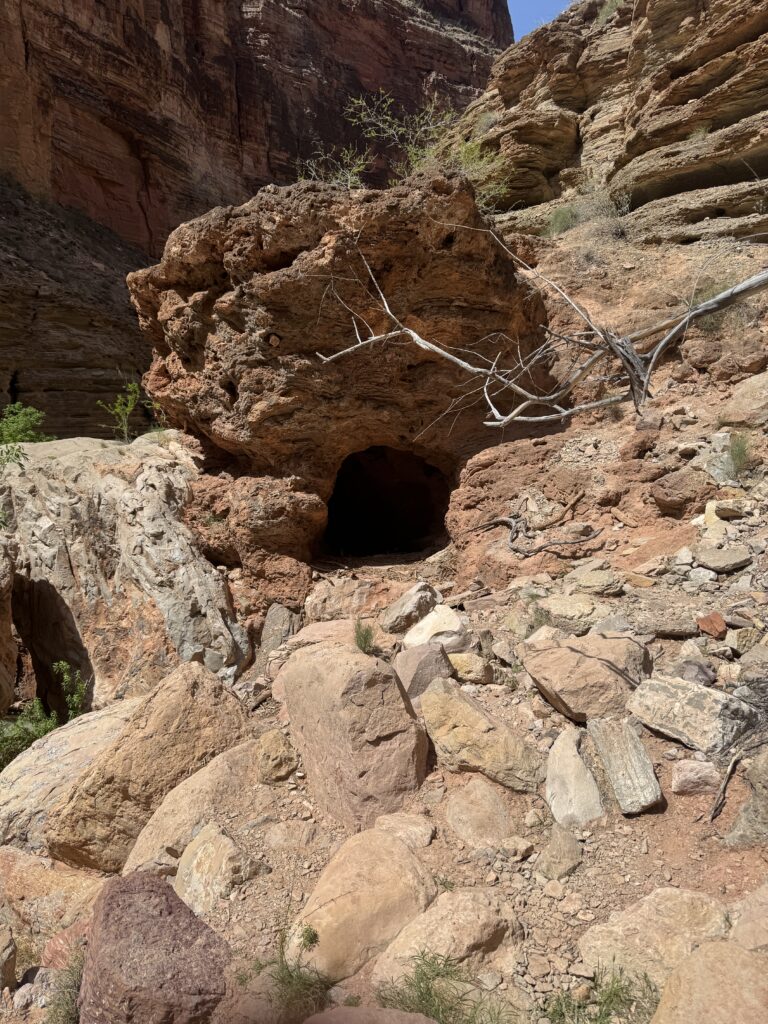
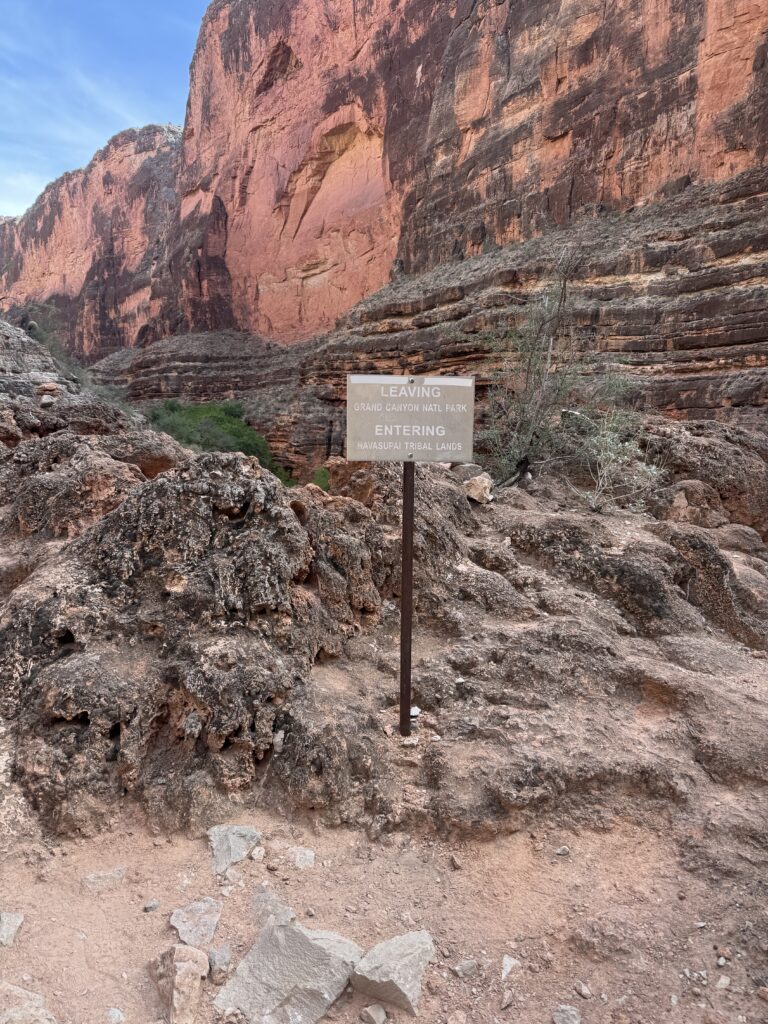
The signs are all there (mostly), such as the hot pink flags tied to tree branches and painted arrows on the rock face, or cairns in the middle of the creek bed, but when you’re exhausted from an all day hike running low on water and food, you’re going to miss them if you don’t pay serious attention. PS! If you get *almost* to the end of the way there and wonder if you should go through this big ol’ cave, do it! Once you pass through, you’ll hop down onto the creek bed where you’ll wade across a chest high section of the water. I may or may not have had a teeny tiny panic attack going through the scary cave monster area…
(Keep in mind this is what it was like when we went in April 2025, trails can change at any time so be aware of the trail you’re on and be mindful that it can change!)
Drop a Pin on Apple Maps or Google Maps
To drop a pin on your iPhone, open the Maps app and tap and hold your finger anywhere on the map until a pin appears. You can then tap “Pin” to save it or share it with others.
-
- Open the Maps app: Locate and open the Maps app on your iPhone.
- Find the location: Zoom in or out to find the specific location where you want to drop the pin.
- Drop the pin: Tap and hold your finger on the map at the desired location until a pin marker appears.
- Refine the location (optional): If needed, you can tap “Move” to adjust the pin’s position.
- Save or share: Tap “Pin” to save the location as a pin, or tap the share icon to share it with others.
For Android Users:
How to Drop a Pin on Android (Google Maps)
-
- Open the Google Maps app on your Android device.
- Navigate to the location where you want to drop the pin.
- Tap and hold on the map at your desired spot.
- A red pin will appear, and you’ll see location details at the bottom of the screen.
- You can then:
- Tap “Save” to add it to a list (e.g., Favorites, Want to Go).
- Tap “Label” to name the pin.
- Tap “Share” to send the location to someone else.
Why The Confluence Is Worth the Hike
After we made it down Mooney Falls, ( ←which you can read more about in this post), and past Beaver Falls (which I’ll mention more in the next post along with Havasu Falls), I knew we made the right decision about traveling the rest of the way to the Confluence.
Although it seemed intimidating beforehand, it was extremely rewarding and I am so grateful we had the chance to complete it. Even though we were considering doing this bit on the third day, I’m thrilled we made the choice to embark on it during the second. By the third day at Havasupai Campground, our legs were toast, we were getting burnt, and my feet had so many blisters that I stopped counting.
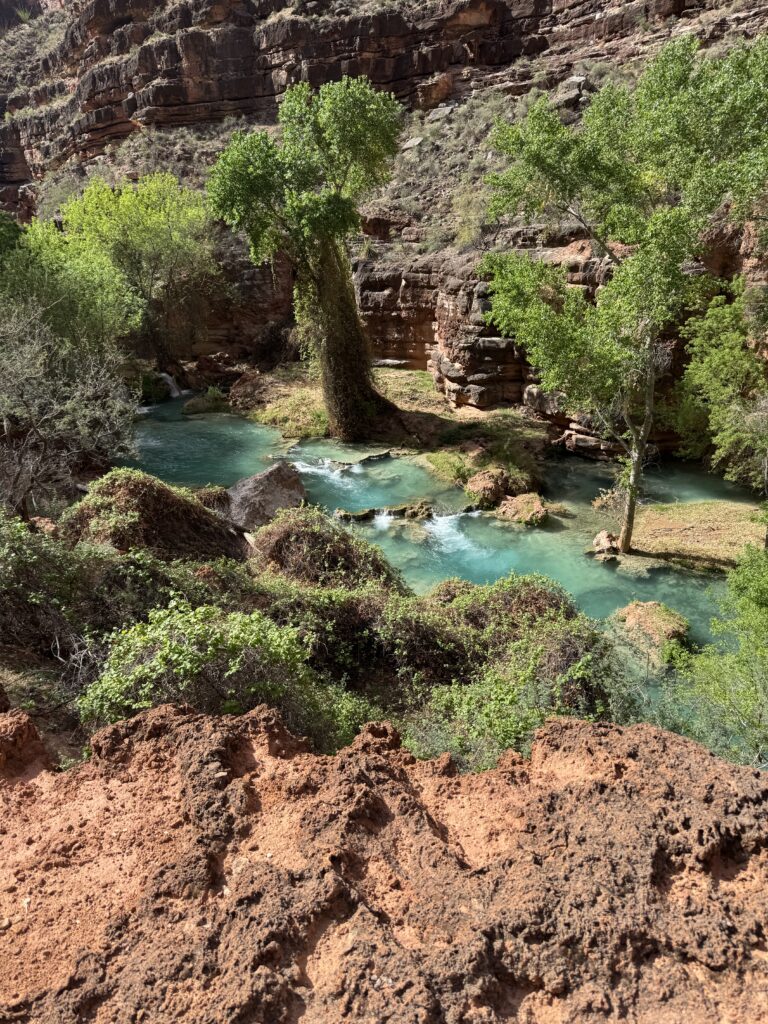
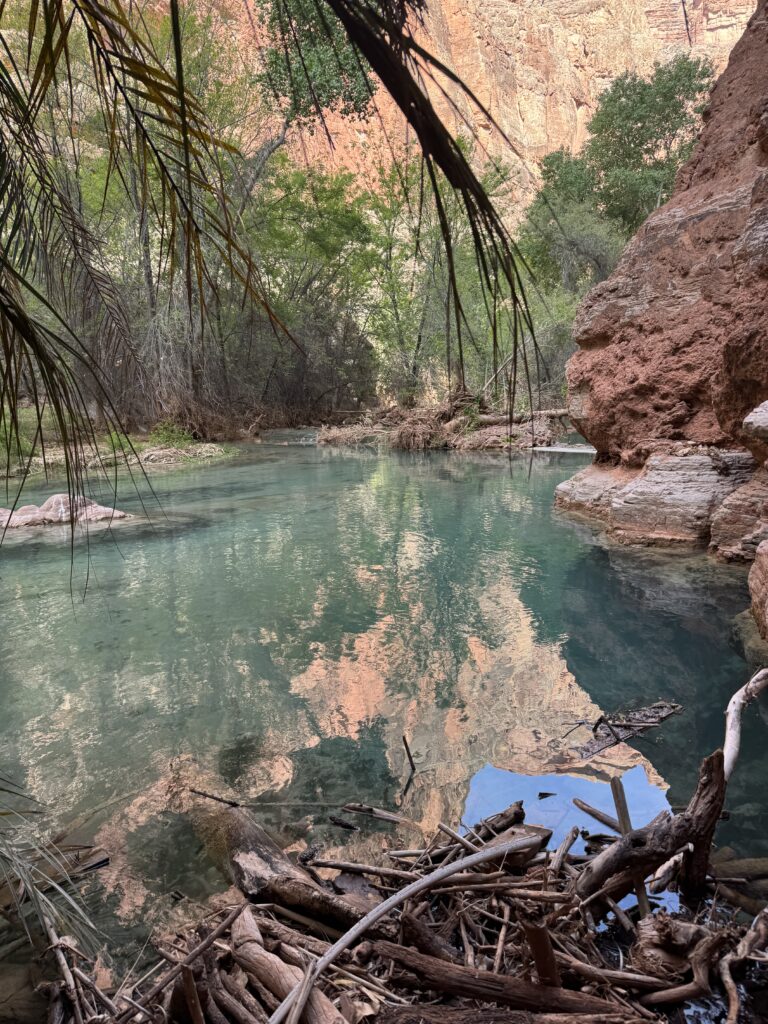
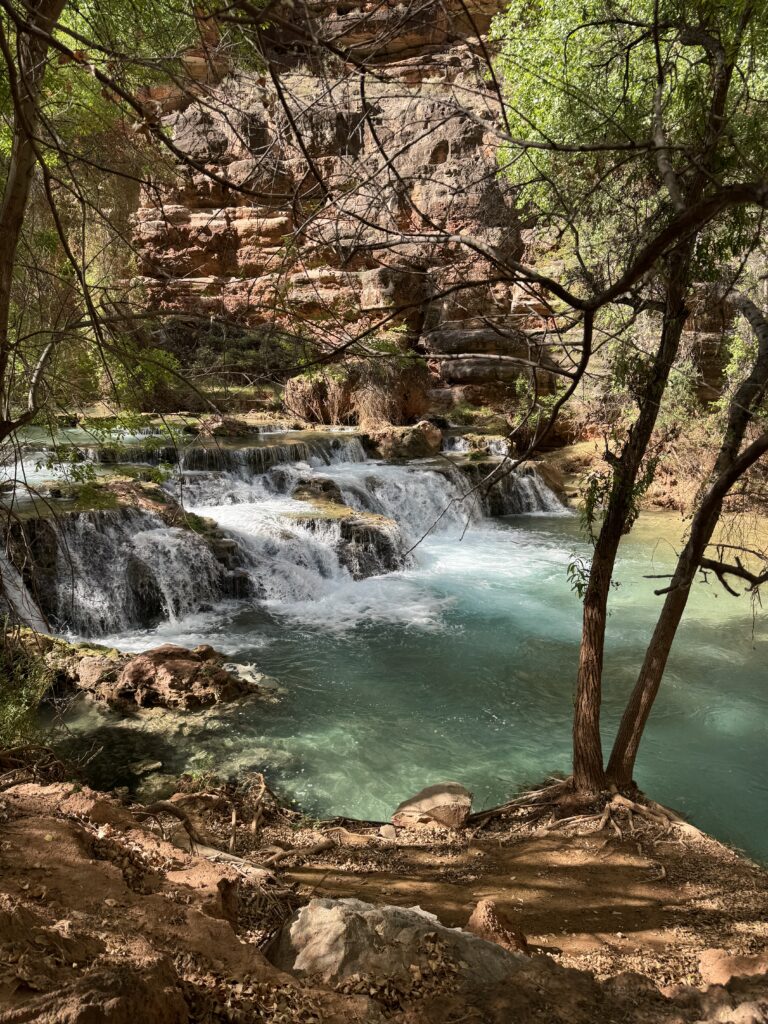
If you’re thinking about checking it off your to-do list, I promise it’s worth the effort. Sure, it’s a bit more challenging than I’d anticipated, but what’s the fun if there are no surprises?! The end where the Colorado River and Havasu Creek meet is an awesome site to see. Since we weren’t there during monsoon season (July through early September), it wasn’t brown and muddy looking like you’ll see on some videos. It was a beautiful bright blue fading into a dark green, and there were even a bunch of fish huddled up there as well!
The Way Back: Sunsets, Goats & Gratitude
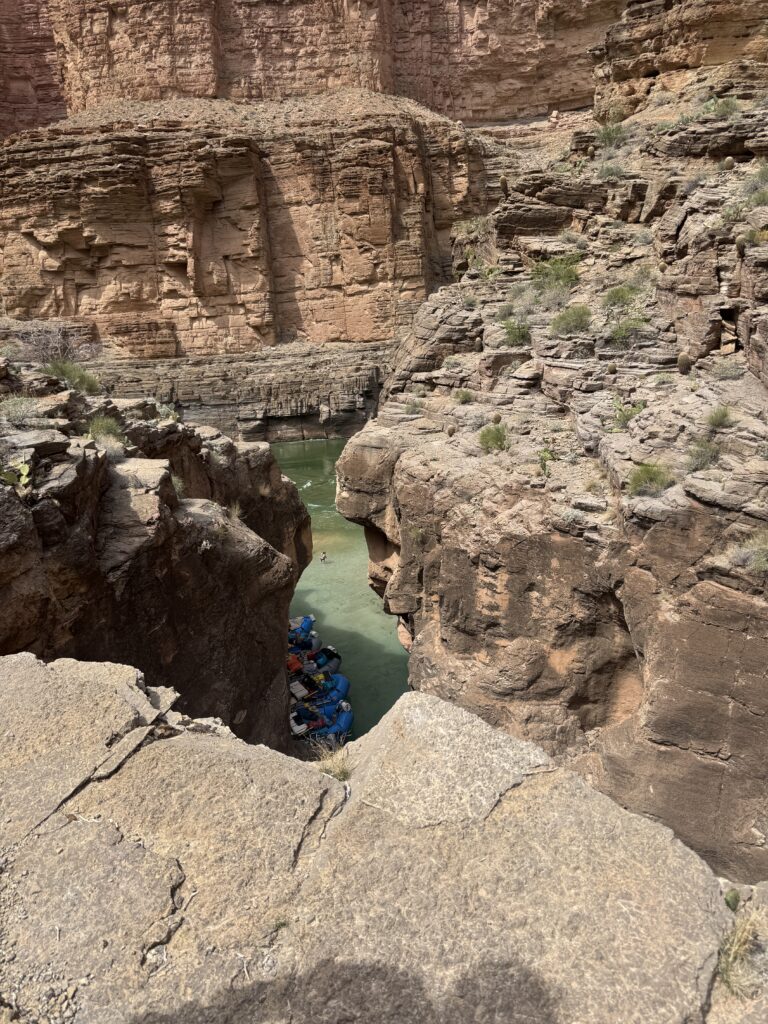
Down at the bottom of the cliff face overlooking it, is a place where you can get in to swim a little and view the kayaks or rafts set aside as the visitors travel from the Colorado to break at Havasu Creek. We had lunch on the top while we watched some others pass by, and then made our way back again.
The entire day trip took around 10 hours, of which I’d chalk up about an hour of that stopping for pee cloth breaks or for lunch. If you’re planning on adding this to your Havasupai journey, make sure to bring more than enough water and lunch for sure. We considered bringing only bars, but I’m so glad we packed the dehydrated meals just in case!
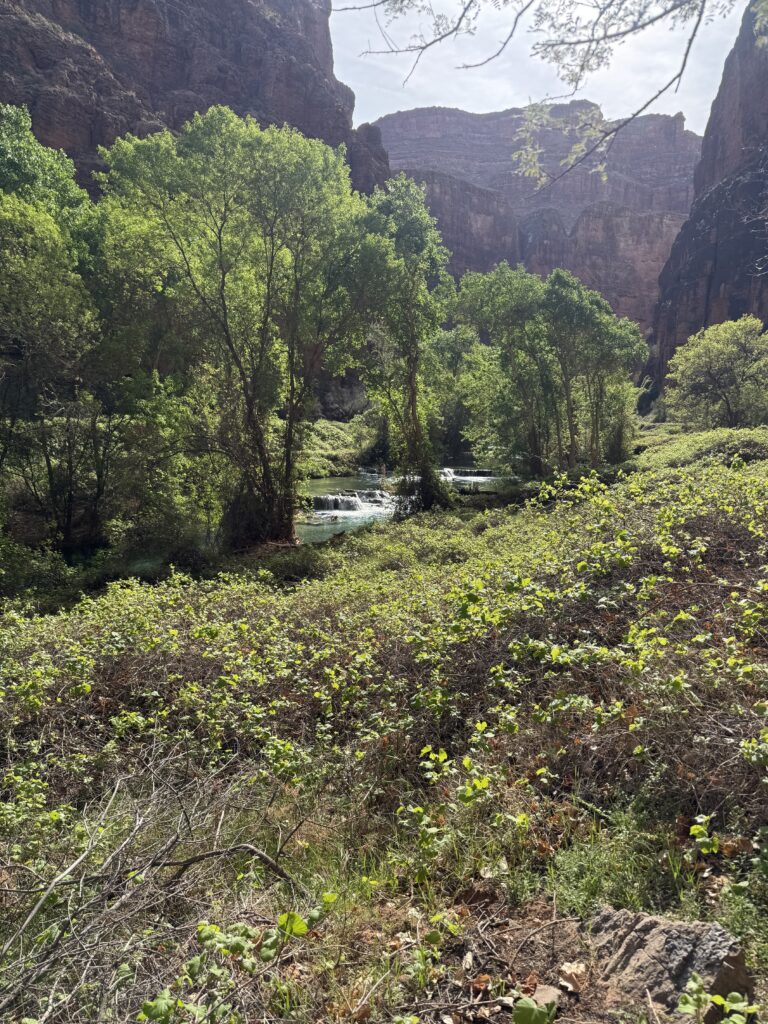
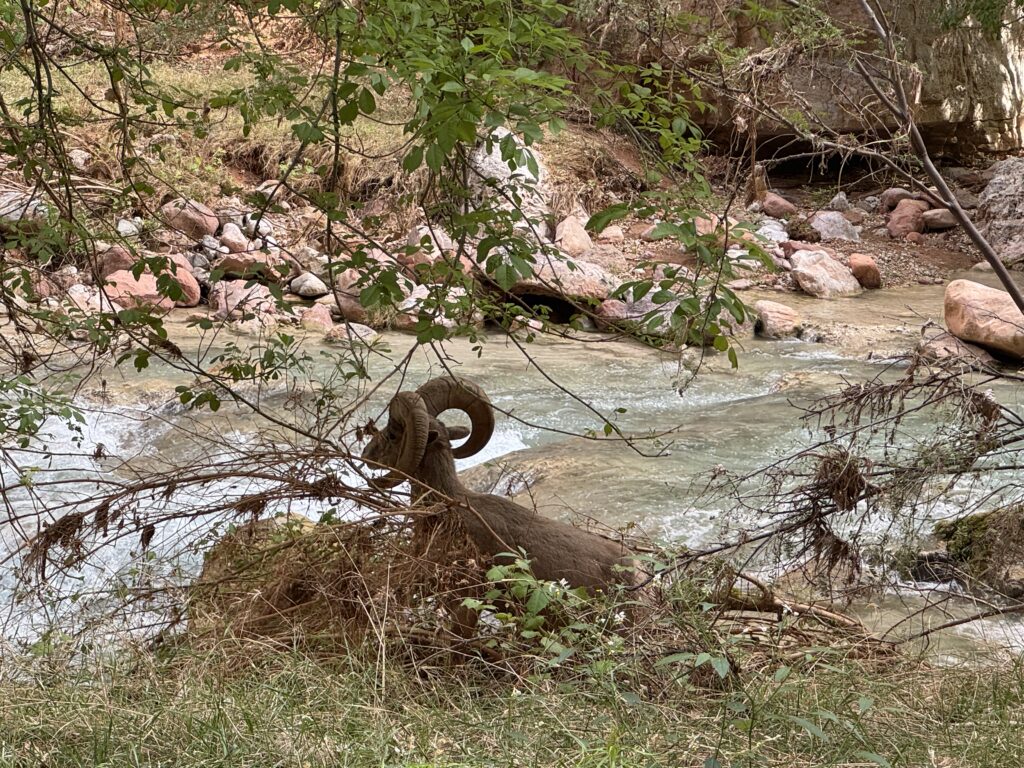
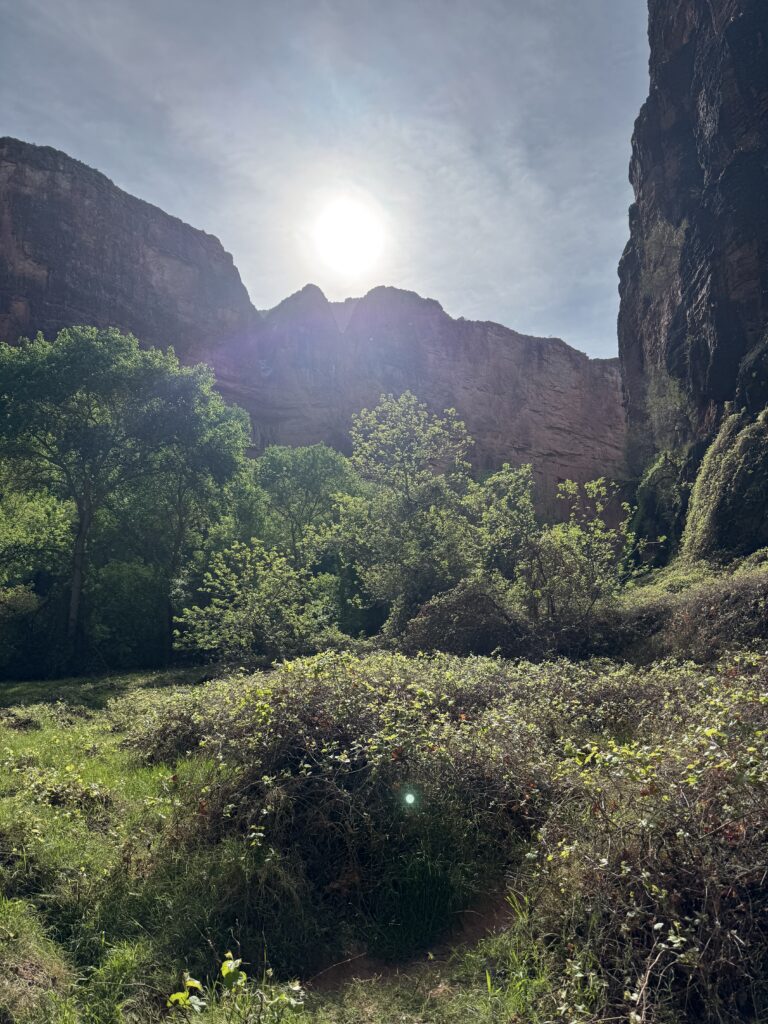
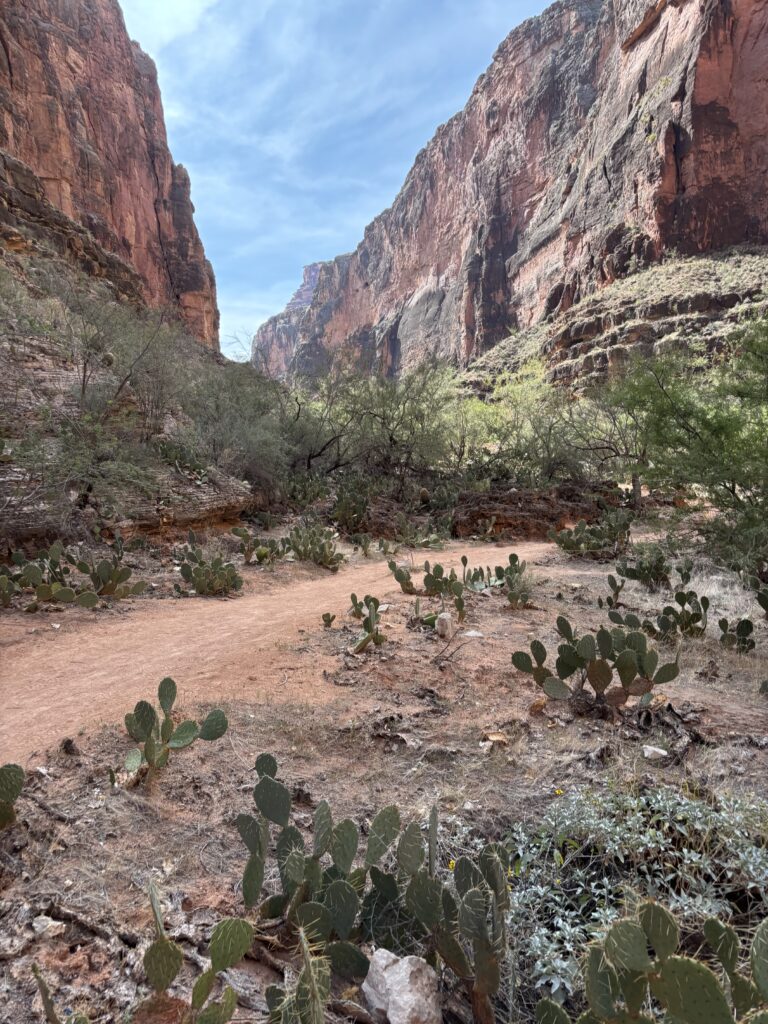
As we made our way back to Mooney Falls, one of my favorite spots of the trail was just before that where the sun was starting to fade over the canyon walls while we walked through a beautiful little field of green between the towering red cliffs. Another fun memory was the mountain goats checking us humans out on their trail and a lone hummingbird that was lucky enough to find a few tiny cactus flowers.

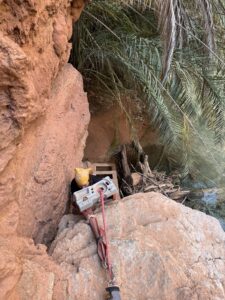
The Confluence Ladder
Another one of my favorite parts was the ladder up onto the cliff that is right after the palm tree. It’s a beautiful stretch of water and a really cool part to hike. (Check out the pics above)
Difficult? Of course. But nonetheless, one of the most memorable hikes for us to date. I’m also happy to note that a lot of the jaggerbushes (that’s Pittsburghese for you guys out there), were mostly gone due to the flood wiping them away last fall.
Make sure to check back early next week to hear about our third and final full day in the campground! I’ll cover where to find the drinking water, what the best campsites are, and how to snag yourself some homemade hot fry bread from the locals!
Byeeeee for now! Thanks for reading!!!
Thank You For Reading “The Confluence”
I want give a shout to all those following along my journey including today’s post about the Confluence. It was a treacherous hike but so worth it in the end.